Clone a GitHub Repository
GitHub is a popular Git repository hosting service. Sophos Factory pipelines can clone git repositories hosted on GitHub to the runner using the built-in “Git Clone” step module. This technique can be used to download existing automation content, such as scripts or configurations, which can be utilized by subsequent steps in a pipeline.
This tutorial will walk you through creating an example pipeline that clones a git repository from GitHub. We will then display the contents of the destination directory to verify that the files were downloaded successfully.
Prerequisites
- A GitHub repository is required for this tutorial. Click here to learn how to create a GitHub repository.
- A previously generated RSA public/private keypair is required for this tutorial. This key pair will be used to authenticate with GitHub. Click here to learn how to create an SSH keypair.
Step 1: Choose a Repository and Configure a Public SSH Key
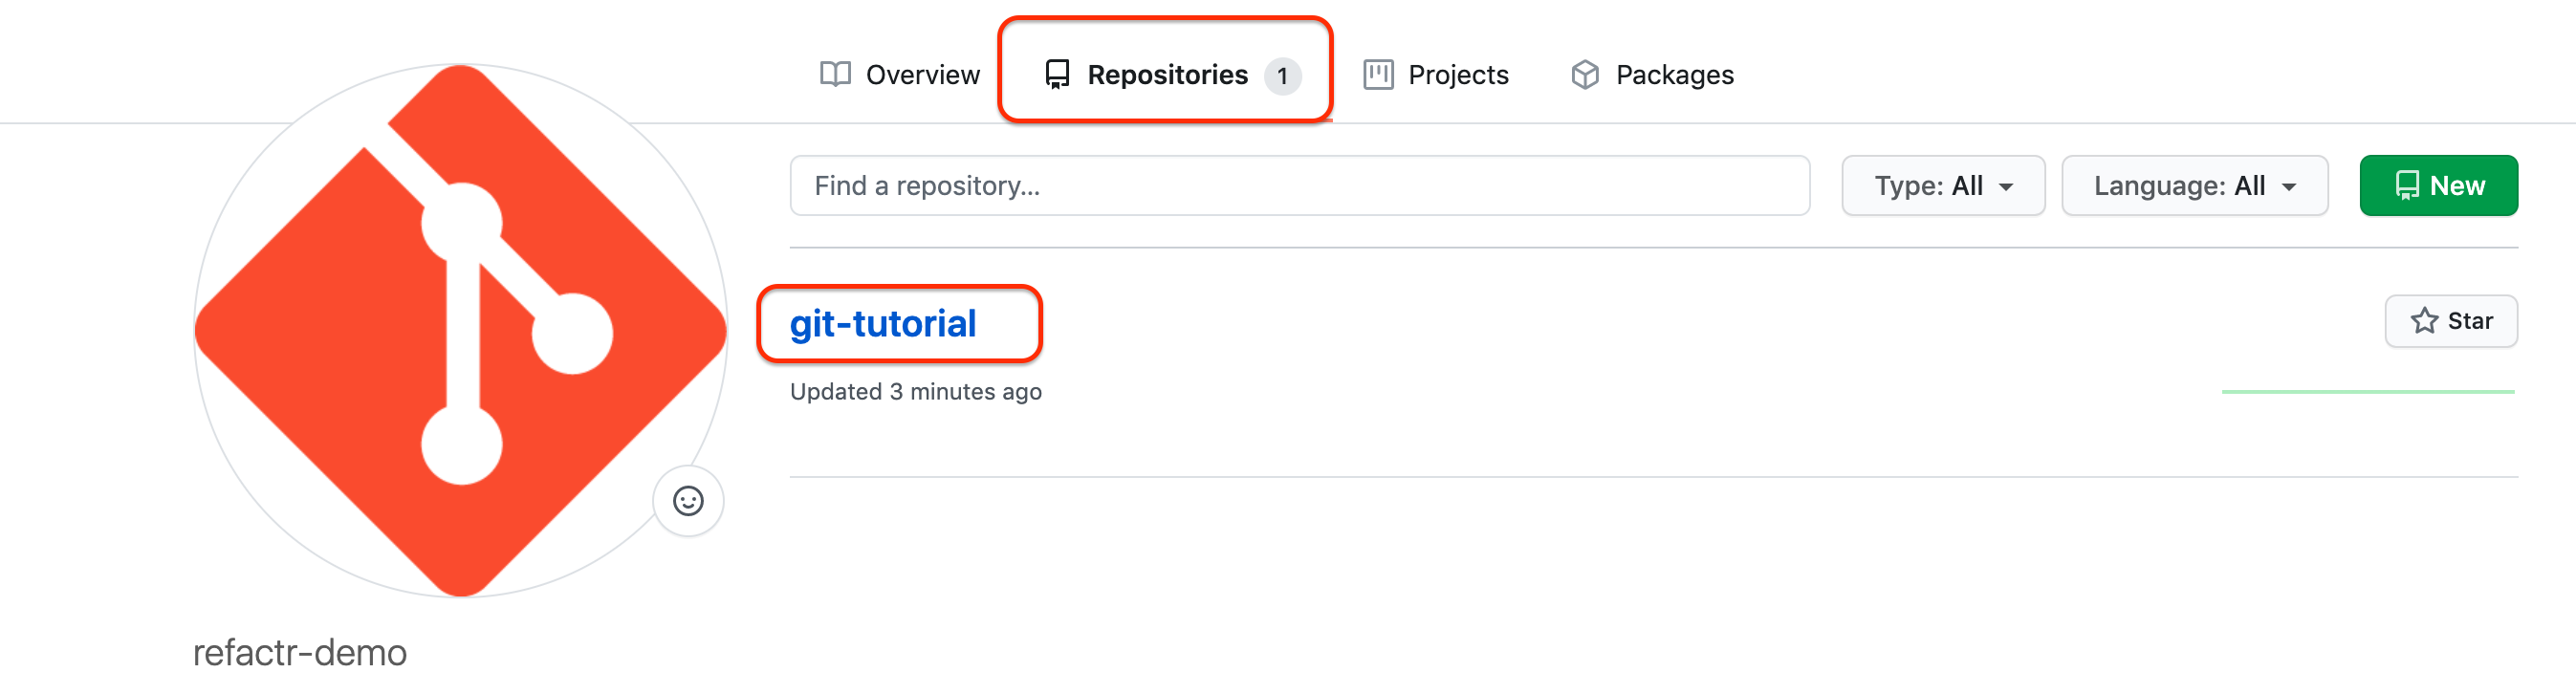
Log in to GitHub and choose a repository to use. In this tutorial, we will be using an example repository called “git-tutorial”.
Configure a public SSH key in your GitHub account
A public key from the RSA keypair needs to be added to GitHub. To do so:
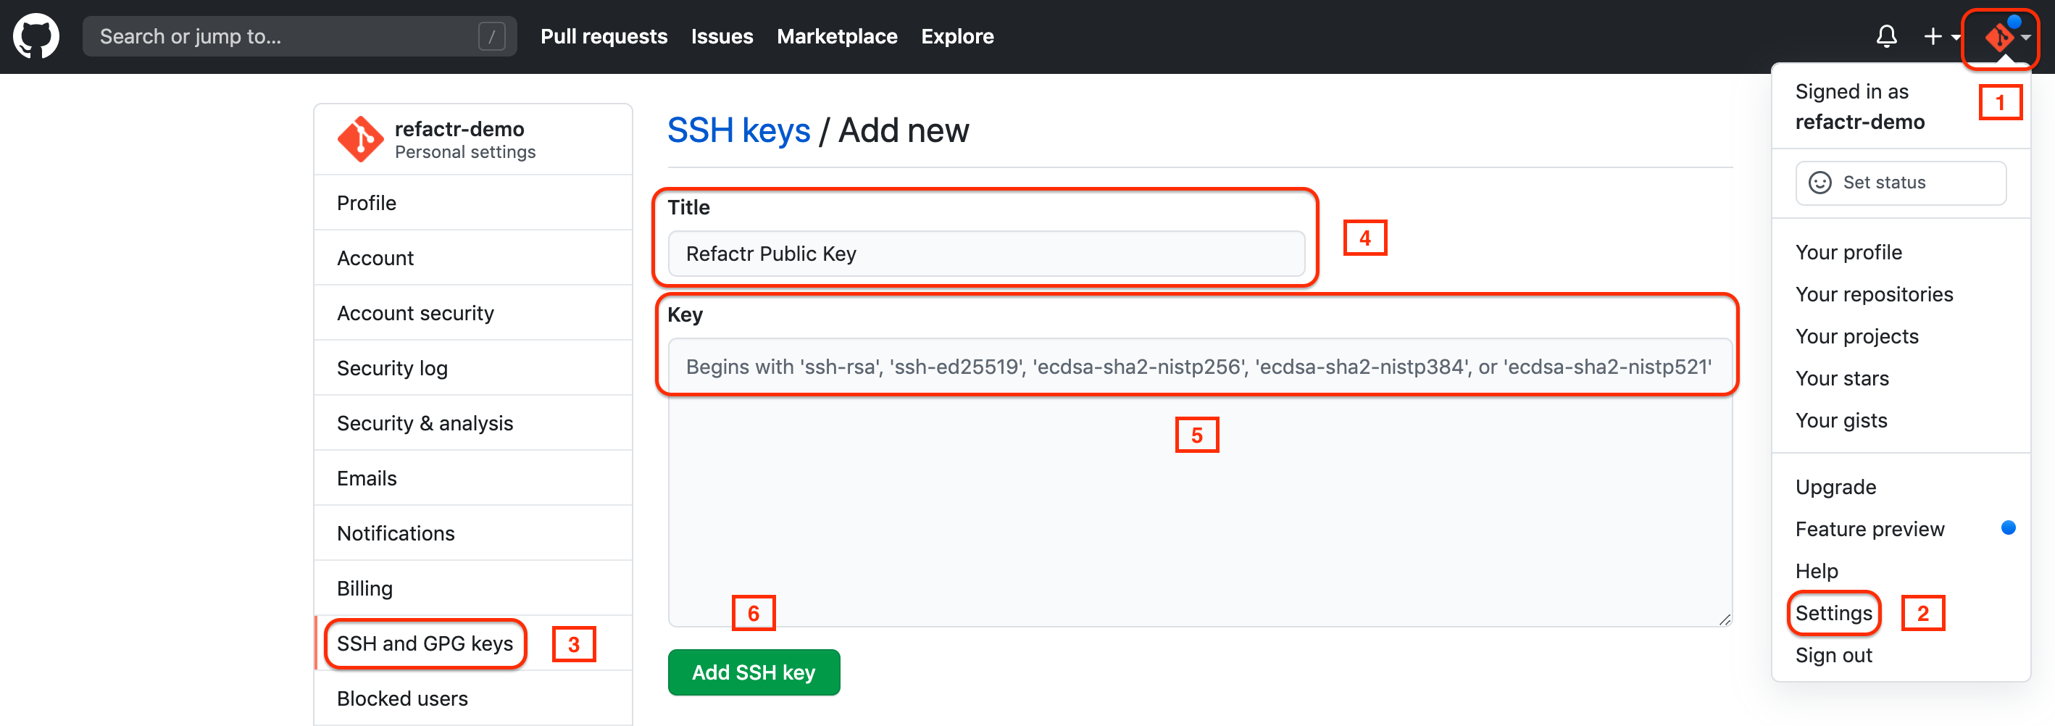
- Log in to Github.
- Go to the properties of your GitHub account.
- Click “Settings”.
- On the left navigation pane, click “SSH and GPG keys”.
- Give the new SSH key a title (e.g. Sophos Factory Public Key).
- In the Key field, paste the public key.
- Click “Add SSH Key”.
Step 2: Add an SSH Private Key Credential
- Log in to Sophos Factory and navigate to the “Credentials” page.
- Click “New Credential”.
- Click “Add Credential”.
- In the Create Credential dialog box, give the credential a name (“GitHub SSH Key”).
- Define a Credential ID (e.g. “github_sshkey”).
- For Credential Type, choose “Built In: SSH Private Key” from the drop-down menu.
- In the SSH Private Key box, paste the private key of your key pair.
- Click “Create”.
The new SSH Private Key Credential will appear in the credential list:

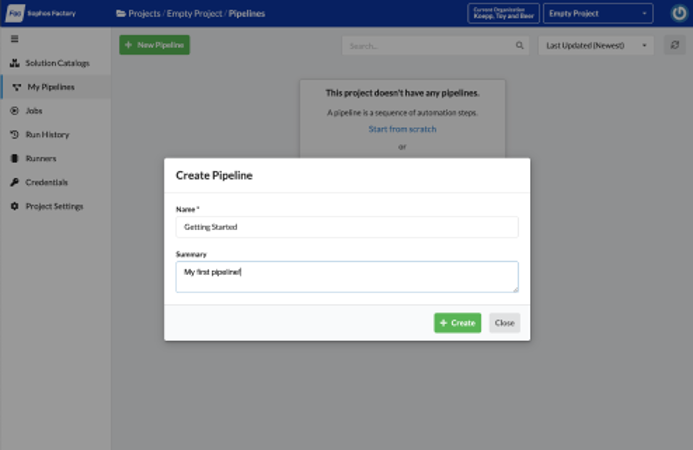
Step 3: Create a New Pipeline
- Navigate to the “Pipelines” page.
- Click the “New Pipeline” button.
- Enter a friendly name for the tutorial pipeline.
- Click the “Create” button.
- You should now see the pipeline builder page.
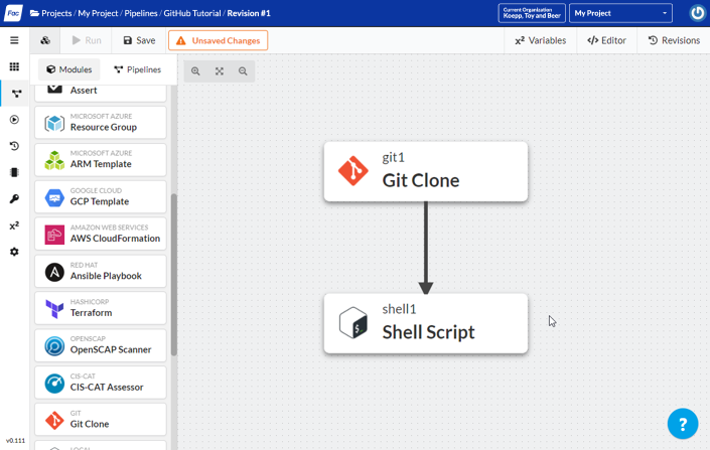
Step 4: Add Git and Shell Steps to the Pipeline
This pipeline will consist of two step modules: Git and Shell Script. In the pipeline builder, drag the Git and Shell Script step modules into the design area. Connect the two step modules with an arrow.
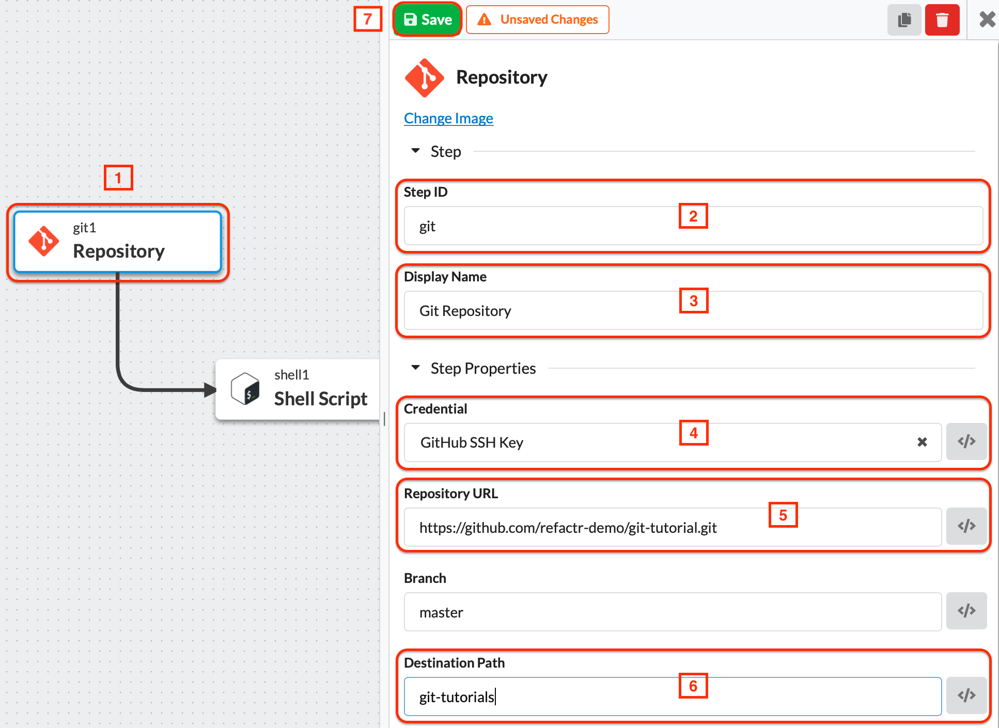
Configure Git step properties
- Click on the Git step to view the step properties.
- Enter a Display Name for the Step ID (e.g. “Git”).
- Enter a Display Name (e.g. “Git Repository”).
- In the dropdown, choose the Credential that was created in Step 2. In this tutorial, it was “GitHub SSH Key”.
- Enter the GitHub Repository URL. The URL should be in SSH format, e.g. “git@github.com:refactr-demo/git-tutorial.git”.
- Enter the Destination Path where the cloned repository data will reside (e.g. “git-tutorials”)
- Click “Save”.
The GitHub repository location and link can be easily copied from your GitHub account. For instructions on how to do this, please visit: How to copy a GitHub repository location
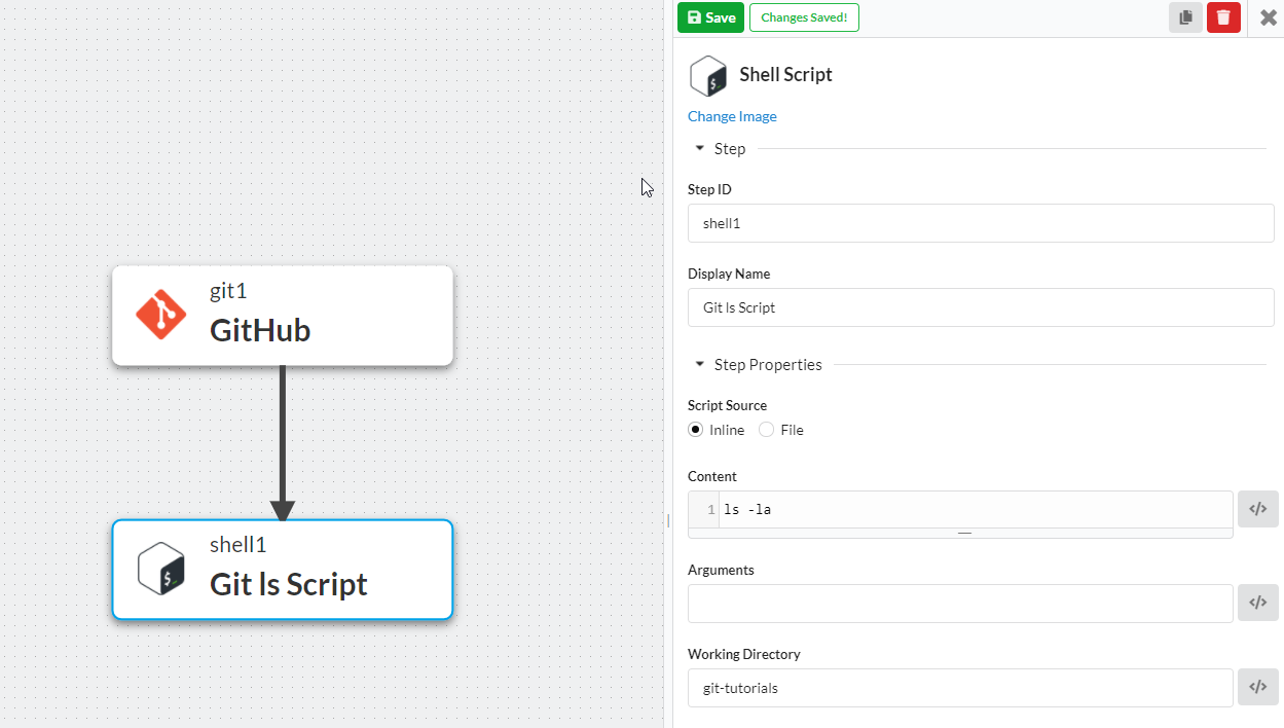
Configure Shell Script step properties
Now we’ll configure the Shell Script step, which will display the contents of the clone directory.
- Click on the Shell Script step to view the step properties.
- Enter a short Step ID (e.g. “gitshell1”).
- Enter a Display Name (e.g. “Git ls Script”).
- Enter a Working Directory that matches the Destination Path entered in the previous section (e.g., “git-tutorials”).
- Click “Save”.
Save the pipeline
- Click “Save” in the upper left-hand corner.
- Add a short comment about the changes you made.
- Click the blue “Save” button below the comment box.

Step 5: Run the Pipeline and Observe Output
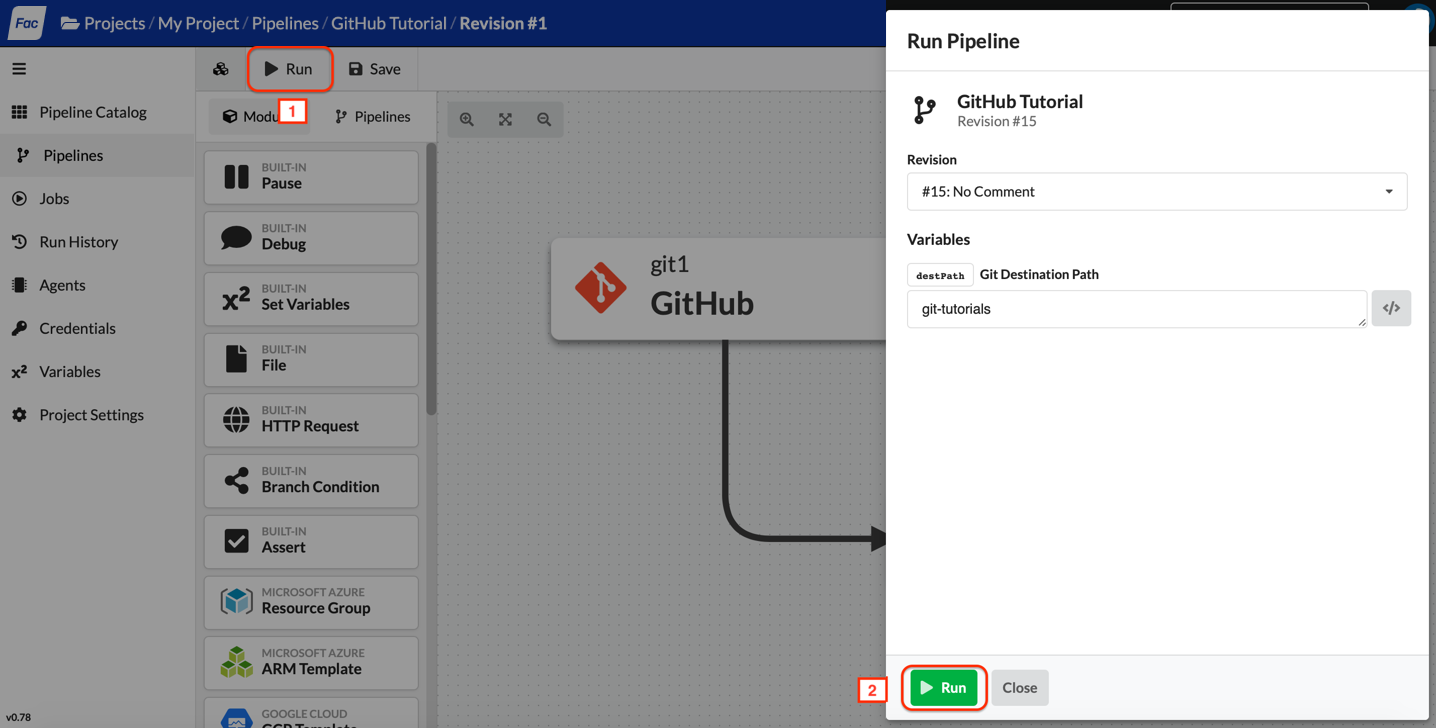
- In the pipeline builder, click “Run”.
- In the “Run Pipeline” dialog box, accept the defaults and click “Run”. You should be redirected to the run page.

Note that the Git and Shell Script Step Modules is complete and the content of the cloned GitHub repository is listed successfully.